

Model Sharing
You will be guided through three methods for sharing models within the Modelers community in this document, including:
- Use the openMind Hub Client open-source tool to upload models to model repositories.
- Run Git commands to upload models to model repositories.
- Upload the model to the model repository through push_to_hub in openMind Library.
Before contributing models to the Modelers community, you need to register an account.
Creating Tokens
A token is required for subsequent operations in the Modelers community. Log in to Modelers, click Access Tokens in My Account, and create a token with the write permission.
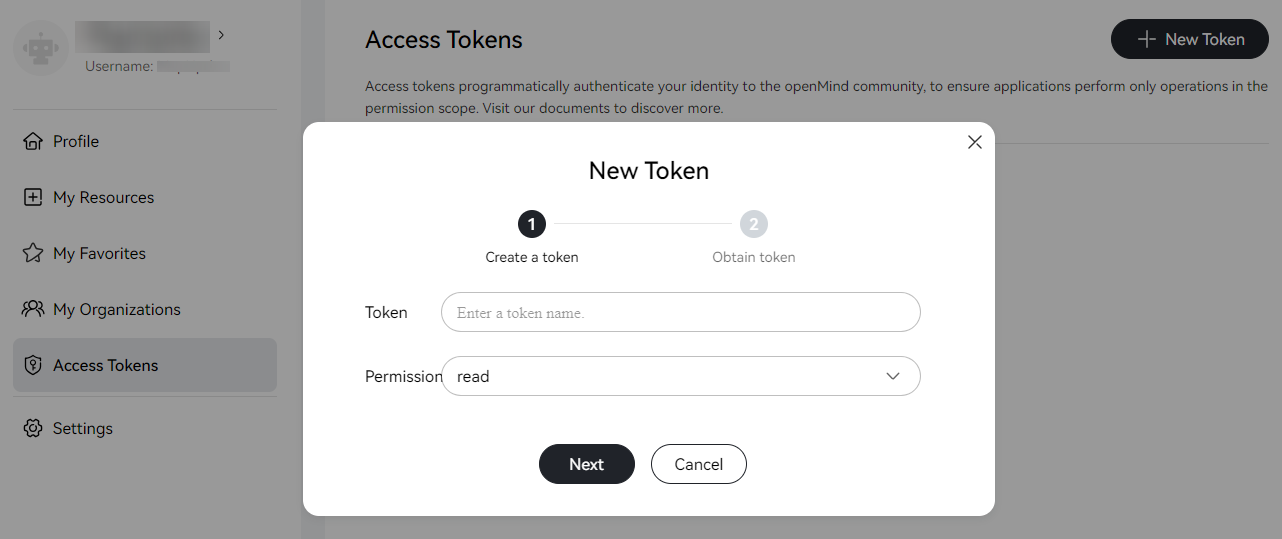
The token is only visible at the time of creation. Keep it secure.
Uploading Models Through openMind Hub Client
openMind Hub Client is an open-source tool that allows you to upload a model to the model repository using the command-line interface (CLI).
Installing openMind Hub Client
Refer to openMind Hub Client Installation to install openMind Hub Client.
Creating Model Repositories
- Log in to the Modelers community, and click Models on the top navigation bar of the home page. Then, click Create Model to perform subsequent operations.
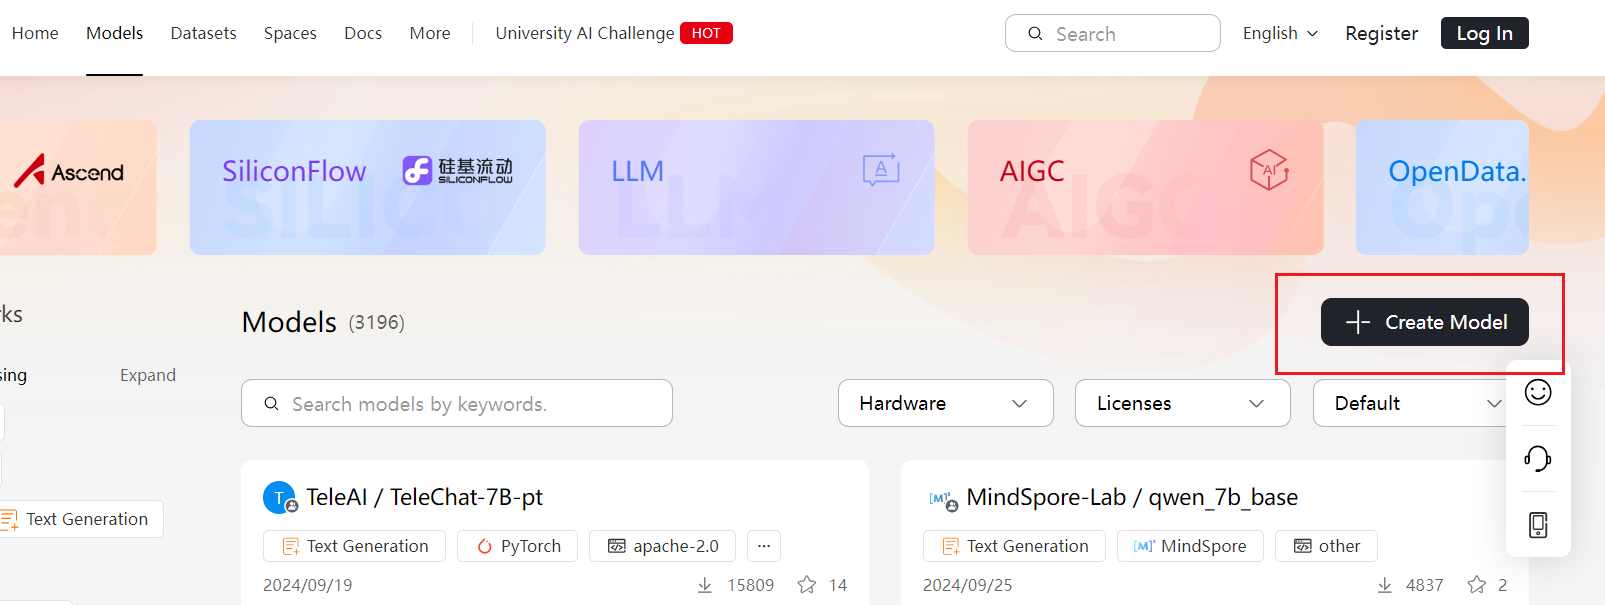
- Enter the repository information and click Create to create a model repository.
You can also use openMind Hub Client to create a model repository through coding. The following is the sample code:
from openmind.utils.hub import create_repo
create_repo(repo_id="your-model-name", token="your-token")
After the model repository is created, a model card is automatically generated, which is a README.md file that contains model information. To effectively display the capabilities, limitations, and other relevant information of your model, you can directly edit the README.md file on the page.
Uploading Model Files
openMind Hub Client provides the upload_folder function for uploading folders to the repository. Common parameters include:
folder_path(required): path of the local folder to be uploaded.repo_id(mandatory): repository address.repo_type: repository type. If the type ismodel, this parameter can be omitted. If the type isdatasetorspace, this parameter is mandatory.
The following example shows the code for uploading all files in the local /path/to/local/folder folder to the username/your-model-name repository. By default, all files in the folder are uploaded to the root directory of the repository.
import openmind_hub

openmind_hub.upload_folder(
    folder_path="/path/to/local/folder",
    repo_id="username/your-model-name",
    repo_type="model",
    token="your-token",
)
For details about other upload APIs of openMind Hub Client, see Upload APIs. The document lists all available upload APIs and their methods for you to upload and manage data more efficiently.
Uploading Models Through Git Commands
If you have a copy of a repository on your local computer, you can use Git LFS to upload large files.
Before uploading a model using Git, ensure that you have created a model repository in the community and cloned the repository to your local environment.
Installing Git LFS
Run the following command to install Git LFS. You only need to perform the installation once, and do not need to install it in every local repository.
git lfs install
Tracing Large Files
Trace large files (over 100 MB) in the local Git repository, and trace the target file according to your requirements. For example, you can trace files of a certain type or with a specific file name. The following is an example:
git lfs track "*.7z" "*.bin" "*.bz2" "*.ckpt" "*.h5" "*.lfs.*" "*.mlmodel" "*.model"\
 "*.npy" "*.npz" "*.onnx" "*.pb" "*.pickle" "*.pkl" "*.pt" "*.pth" "*.rar" "*.safetensors"\
 "saved_model/**/*" "*.tar.*" "*.tar" "*.tgz" "*.zip" "*tfevents*" "*.gz"
You can also trace specific large files. The following is an example:
git lfs track "big_file.bin"
Cloning a Repository
Run the following command to clone a model repository in the Modelers community to your local host:
git clone https://modelers.cn/<username>/<model_name>.git
Replace <username> and <model_name> in the command with the actual username and model repository name.
Editing Files in a Repository
You can use a text editor or IDE to edit files in the cloned repository. For example, you can copy or move your model file to a proper location in the repository.
Using Git to Upload Model Files
In your local repository, add the model files to the Git index and run Git commands to upload the files.
git add .
git commit -m 'commit message'
git push
Account and Password Required When Using Git
You need to enter the account and password when uploading through Git. The following is an example:
Username for 'https://modelers.cn': Modelers community account name
Password for 'https://modelers.cn': token with the write permission
Note that the upload password of Git must be a token with the write permission.
Uploading Models Through push_to_hub
push_to_hub is an interface provided by the trainer module in openMind Library. After model training is complete, it automatically uploads your model, configuration files, and other related files to the specified repository in the Modelers community. This feature not only simplifies the model sharing process, but also enables users of the Modelers community to access and utilize your excellent model achievements more conveniently.
Installing openMind Library and openMind Hub Client
Install openMind Library and openMind Hub Client by referring to the following documents:
Uploading Through push_to_hub
Example:
from openmind import Trainer, TrainingArguments
from your_utils import YourModel, YourDataCollator, YourTokenizer
from your_datasets import your_train_dataset, your_eval_dataset

model = YourModel(...)
tokenizer = YourTokenizer(...)
data_collator = YourDataCollator(...)

training_args = TrainingArguments(
    output_dir='./results',          # output directory
    num_train_epochs=3,              # total number of training epochs
    per_device_train_batch_size=16,  # batch size per device during training
    warmup_steps=500,                # number of warmup steps for learning rate scheduler
    weight_decay=0.01,               # strength of weight decay
    logging_dir='./logs',            # directory for storing logs
    push_to_hub=True,                # push the model to openMind Hub
    hub_model_id="username/your-model-name",  # the name of the repository to push to
    hub_token='your_token',          # your token with write permissions
    hub_private_repo=False,          # whether to set the model as private
)

trainer = Trainer(
    model=model,
    args=training_args,
    train_dataset=your_train_dataset,
    eval_dataset=your_eval_dataset,
    tokenizer=tokenizer,
    data_collator=data_collator
)

trainer.train()

trainer.push_to_hub()                # push your model to openMind Hub
In the provided sample code, call the trainer.push_to_hub() method to upload the trained model to the Modelers community. To ensure that the model can be successfully uploaded, you need to add the following parameters to training_args:
push_to_hub: whether to push the model to the Modelers community.Truemeans to upload the model to the community after the training is complete and share it with community members.hub_model_id: repository identifier, which consists of your Modelers community username and the name of the repository you want to create.hub_token: token with the write permission, which is used to ensure that your model can be correctly uploaded to the community.hub_private_repo(optional): whether to set your model to a private model. The default value is False, indicating that your model is public.
Note that trainer.push_to_hub() can package and upload the model, configuration files, and related files to the specified repository in the Modelers community. Ensure that all necessary parameters are correctly set before this operation. For details about more parameters, see Trainer APIs.
After that, you can log in to the Modelers community and access your repository to view and manage the uploaded models and other files. This process not only simplifies the model sharing process, but also facilitates the widespread dissemination and application of your model within the Modelers community.